Add Recorded Test Case/Test Steps to Existing Tests
CloudQA’s advanced features allow users to seamlessly append newly recorded test cases to existing tests at any desired location. This documentation outlines the steps to utilize this functionality effectively.
Steps to Record and Append a Test Case Using Chrome Extension
1. Record a Test Case
Open Google Chrome and ensure the CloudQA Chrome Extension is installed and active.
Navigate to the web application you wish to test.
Start recording by clicking on the CloudQA Chrome Extension icon and selecting Record automated test
Perform the desired actions within your application (e.g., clicking buttons, filling forms, navigating pages). These actions will be recorded as steps in the test case.
Once the recording is complete, click on the CloudQA extension icon again and select Pause
2. Save and Append the Recorded Test Case
Upon stopping the recording, the Save Test Case window will appear.
In the Save Test Case window:
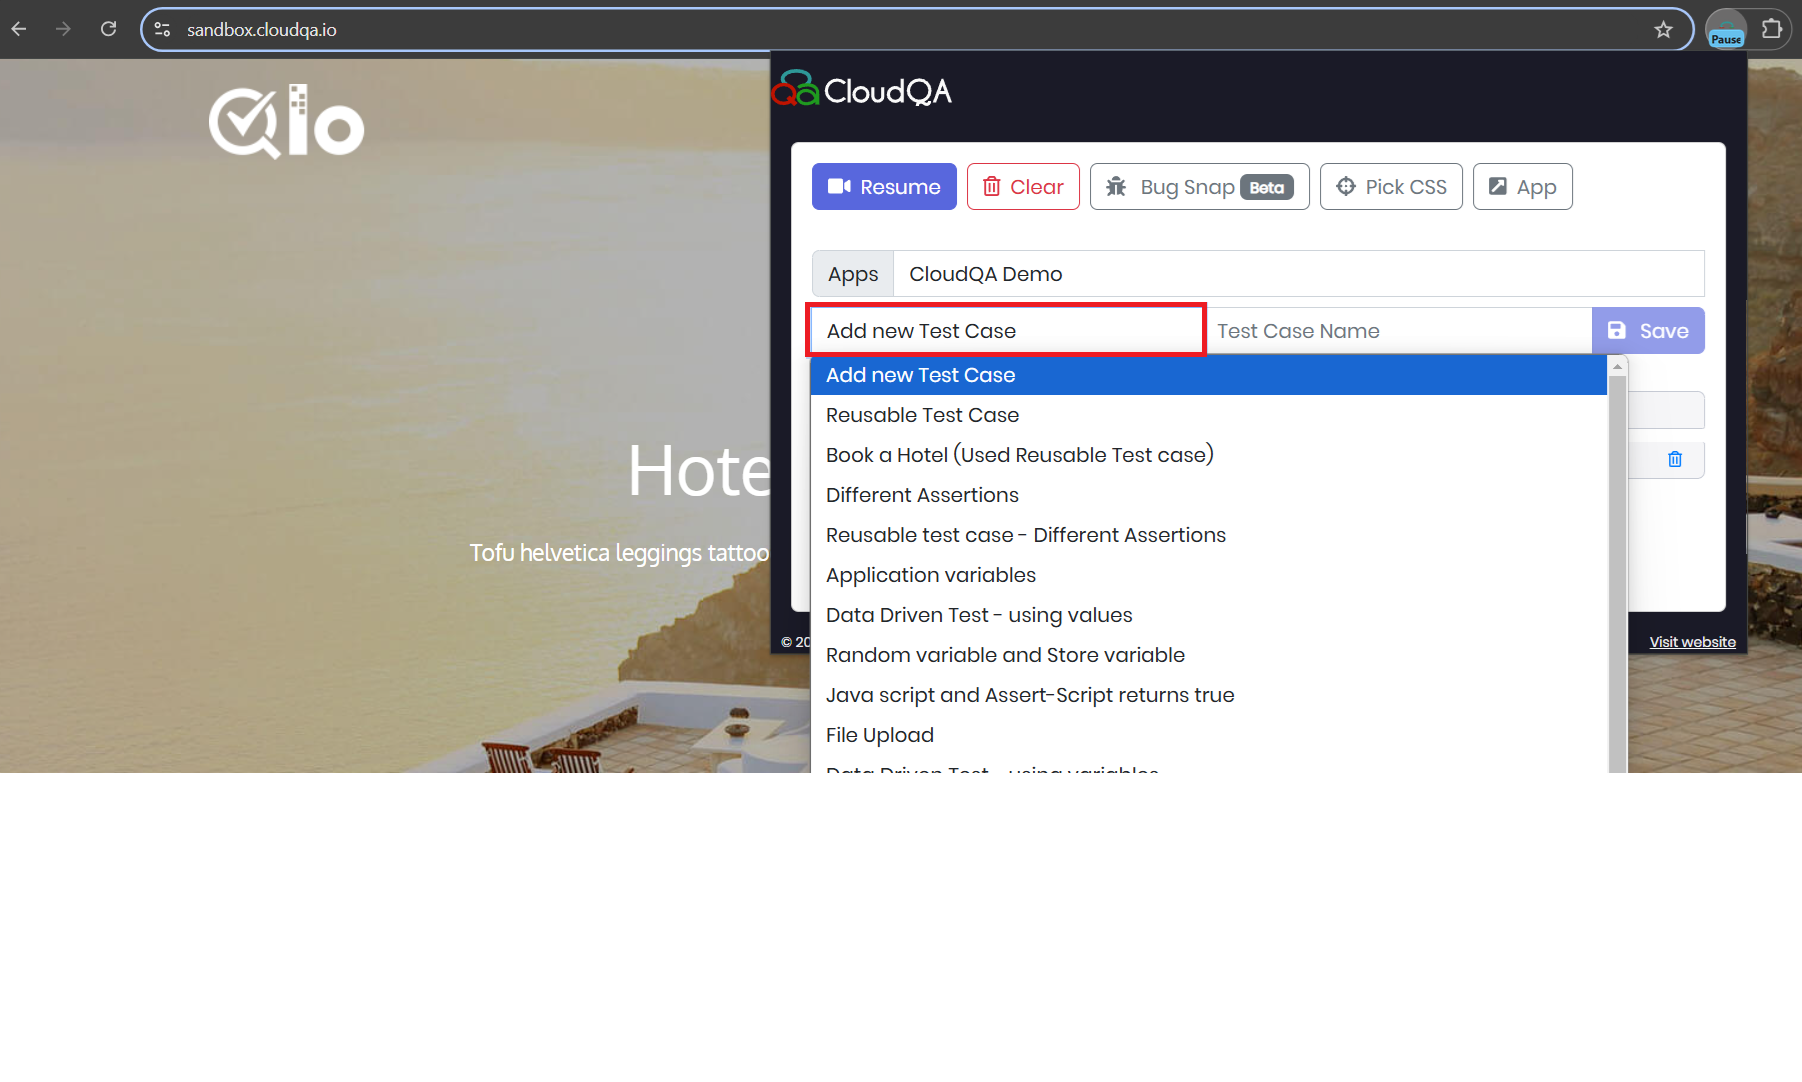
Choose Existing Test Case: Click on Add a new test case to get the list of exisiting tests in the application,Select the existing test case to which you want to append the new steps. A dropdown menu will display available test cases.
Choose Append Location:
- Top: Append the recorded steps to the beginning of the existing test case.
- Bottom: Append the recorded steps to the end of the existing test case.
- Add Step Number: Append the recorded steps within the existing test case at a specific step number.
Enter the step number after which the recorded steps should be added.
- Click Save to finalize the operation.
3. Verify the Changes
Click on Edit Test Case in the extension after saving the test or go to the CloudQA dashboard and open the test case you appended the steps to.
Confirm that the new steps are added at the specified location (Top, Bottom, or In Between).
Run the updated test case to ensure it functions as expected.