API testing with TruAPI
With CloudQA's new streamline interface you can start testing your API's with only a few clicks
- Basic API testing
- API Suite
- How to use application variables in API
- Tests your API parameters with different data sets in one Run
- Test API JSON body with Random Variables in CloudQA
1. Basic API testing
API Runner is where you create and run the API tests of your applications
To run API request you need to first select the Method Type and paste URL of the API. Press Send button to send the request to API or press Add API Test button to save the request
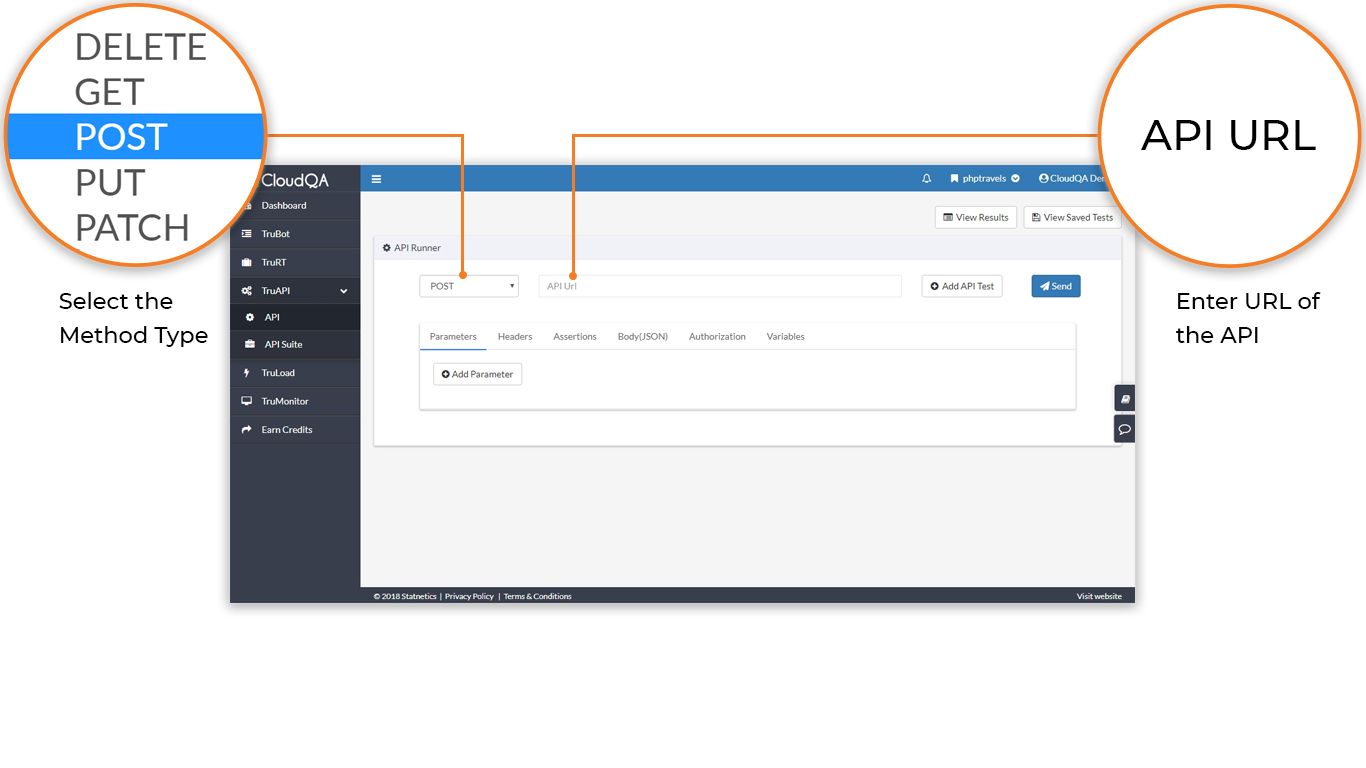
Try this sample Method Type and API URL
- Method Type: GET
- API URL:
https://um5fdww2pj.execute-api.us-east-1.amazonaws.com/dev/todos
Information for API request:
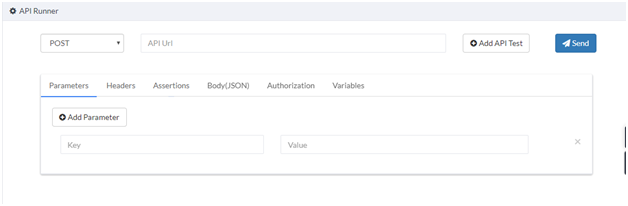
Most of the API require additional inputs to perform the request such as parameters, Headers, Body(JSON), and so on.
To add parameters of the request you can select the respective Parameters tab and press the Add Parameter buttons to add the required information.
Sending an API request with authentication:
In case your hosted API needs an authentication, you can go to the Authorization tab and select the BasicAuth from the dropdown list (Default it is set as Noauth) and then input the Username and Password. You are now ready to send authenticated requests.

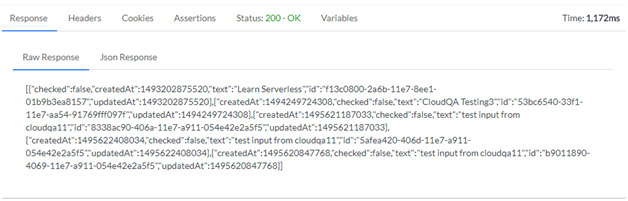
Every API response consists of different values like status code, body, headers, and the time to complete the API request. Below image shows how API response received is portrayed.
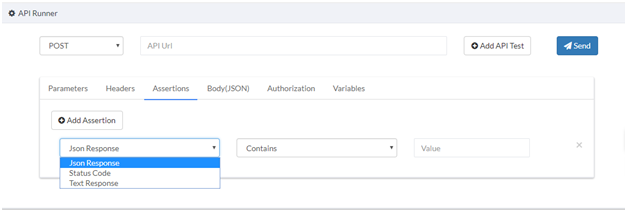
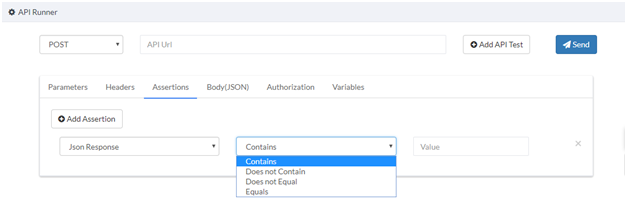
Adding Assertions:
In automation process, it is important that you verify your output using an assertion. To add an assertion in the API Runner, go to the Assertions tab. You can add one or more assertions here.
Follow these steps to add assertions:
- Choose the response type
- Choose the assertion's condition
- Input the value to be checked
You are done adding the assertion
Variables:
Variables tab is useful to store the values that are received as a response from an API request sent. To save responses go to the Variables tab and follow these steps:
- Add Variable
- Give a name to the variable for better understanding of the team
- Input the JSON Path of the value to be stored from the response body
To use the stored value in the variable as expected assertion you can use
__name of the variable__in any other API request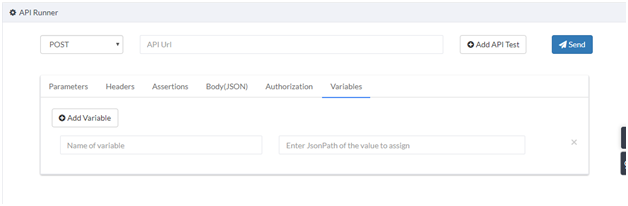
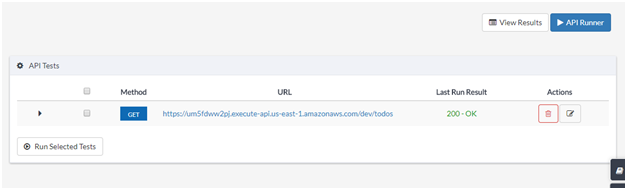
View or execute a saved API request:
When you are in API Runner page use View Saved Tests button to view the saved tests
Select one or more API saved tests and run the selected tests by default the tests shows the last executed run status information
Results will show up the API execution history
2. API Suite
API test suite feature helps you manage automated testing of an application and also frequent testing of your API. You can select the saved API tests to create a group and schedule them.
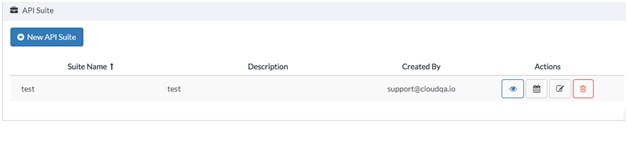
To add and schedule the API test please refer to the test suite link:
http://doc.cloudqa.io/testsuite.htmlSample API hosted by CloudQA for practice
POST - https://um5fdww2pj.execute-api.us-east-1.amazonaws.com/dev/todos
GET - https://um5fdww2pj.execute-api.us-east-1.amazonaws.com/dev/todos
GET - https://um5fdww2pj.execute-api.us-east-1.amazonaws.com/dev/todos/{id}
PUT - https://um5fdww2pj.execute-api.us-east-1.amazonaws.com/dev/todos/{id}
DELETE - https://um5fdww2pj.execute-api.us-east-1.amazonaws.com/dev/todos/{id}
3. How to use application variables in API
Use case: If there are 'n' number of API tests running in a single environment and you want to run them in one or more environments like stage and production, it becomes difficult to change the values(API URL, assertions etc..,) in all 'n' API tests.
CloudQA gives you an option to set variables at an application level, you can change all the values of variables in API tests at one go; whenever needed
Procedure:
1. Define the variables in settings >> application variables
2. Input variablename in place of API URL or assertions to use/compare with the values declared in the settings
Syntax:
__variablename__
( __ - double underscore)
You can use application variables to view or edit the data inputs from one screen instead of visiting all the API request individually. Below is the sample that shows how to use the variables in an API Call.
Example
1. Define a variable
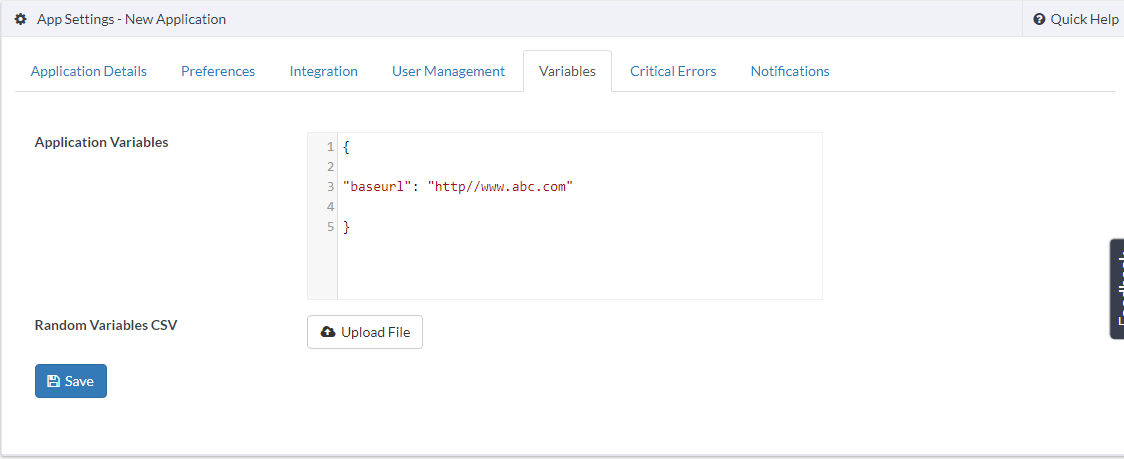
2. Input variables in an API Call

GET -
__baseurl__/users/2PUT -
__baseurl__/api/users/2 [Json body input]POST -
__baseurl__/api/register [Json body input]
4. Tests your API parameters with different data sets in one Run
CloudQA gives a provision to use data file to pass sets of parameter values for a API Test. By selecting a CSV data file , you can test your request parameters with multiple different values as part of a single run.
Running API’s with data files
Navigate to the API Tests and When you initiate a run for a API Test, you will see an option to select a CSV Data file.
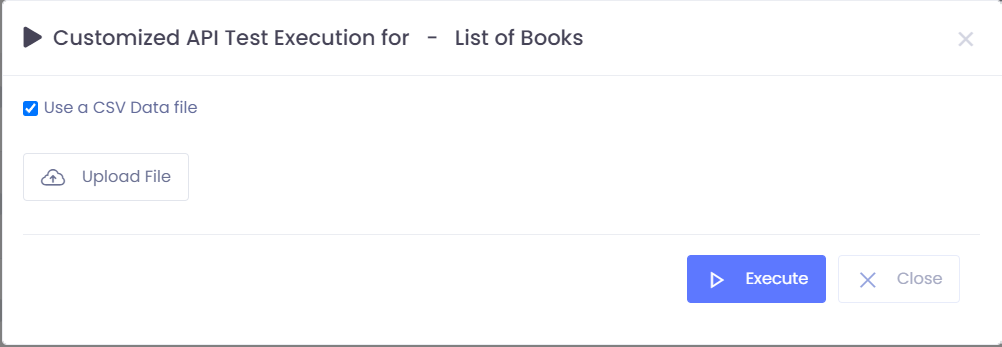
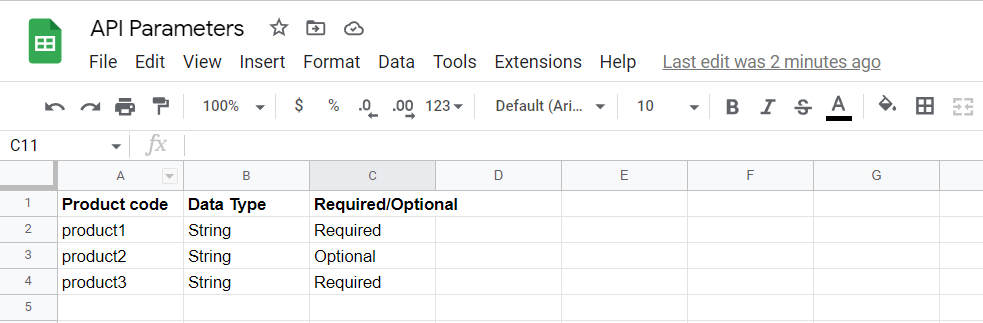
Select the CSV file in the following format with Parameter name as Header and followed by data rows.
Upload the CSV file and run
The API will run the requests for each iteration in the data file. The output you see will indicate the results for any tests you have defined in your requests.
5. Test API JSON body with Random Variables in CloudQA
A few API’s need random data every time it is run. It becomes tedious to input new data for every run. CloudQA has implemented random variable feature which will generate random data every time it is run.
Using Random Variables
Navigate to the API Tests and click on edit or create an new API Tests
Navigate to JSON Body and input the required random variable in the above given format
Currently here are random variables which can be used (doubleunderscore variablename doubleunderscore)
- FirstName, Email, LastName, Word which will generate random first name, email, last name and word respectively
Save the API Test and effortlessly CloudQA API Test will take care of data generation during execution